Menu
Click on the section you would like to go to:
Skiller Menu
Click on the section you would like to go to:
- Account activation
- Basics
- Create project
- Public profile
- References
- Job notifications
- Board notification
- Message system
- Completed job
- Mutal agreement
- Incomplete job
- Understanding the Token System
- Sleep mode
- Photo upload
- Photo ID upload
- Payment
- Templates
1. Account activation
Your account is pending activation by the admin. To complete the activation process, the admin will review the photo ID and the photo you uploaded during registration. If both documents pass the verification process, your account will be successfully verified and activated.
2. Basics
Watch this quick guide on the basics and learn how to navigate the platform!
3. Create a project
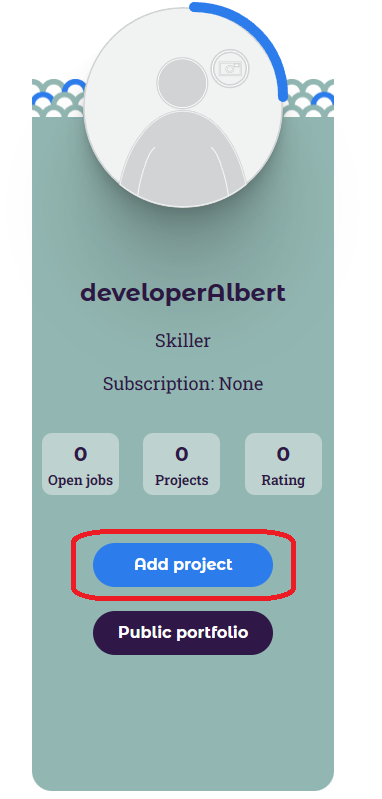
To start a project, simply click the 'Add Project' button. Fill out the form with all the necessary details, and once you're done, your project will be ready for review and further action on your homepage.
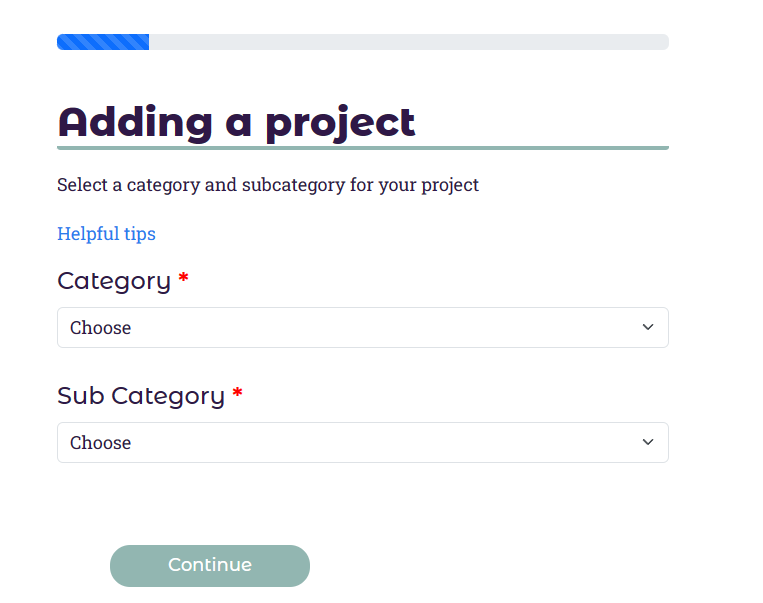
Overview of creating a project
- Category profile title and skill level
- Category questions 1 - 6
- Rates and working hours (indicate how much you will charge for your time when doing freelance work).
- Project name
- Project questions 1 - 6
- Upload images
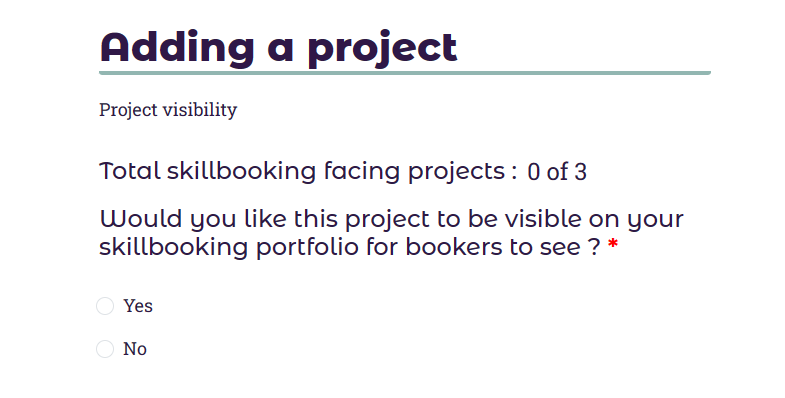
- Project visibility
Understanding the Category Profile
What is the Category Profile?
The Category Profile is a section where you provide information specific to the category and subcategory of your project. This profile is crucial as it forms the first impression Bookers have of your skills and expertise on your SkillBooking profile, particularly for freelancing work.
Purpose:
- The Category Profile helps you showcase your expertise in a specific area by answering targeted questions. These questions are designed to highlight your skills, experience, and suitability for projects within that category. The responses will be prominently displayed on your SkillBooking profile, providing the first impression for Bookers. Note that this information is for your SkillBooking profile and freelancing work and will not be displayed on your public profile.
One-Time Completion:
- You only need to complete the Category Profile once for each category and subcategory. If you decide to create projects in different categories or subcategories, you will need to fill out new profiles accordingly.
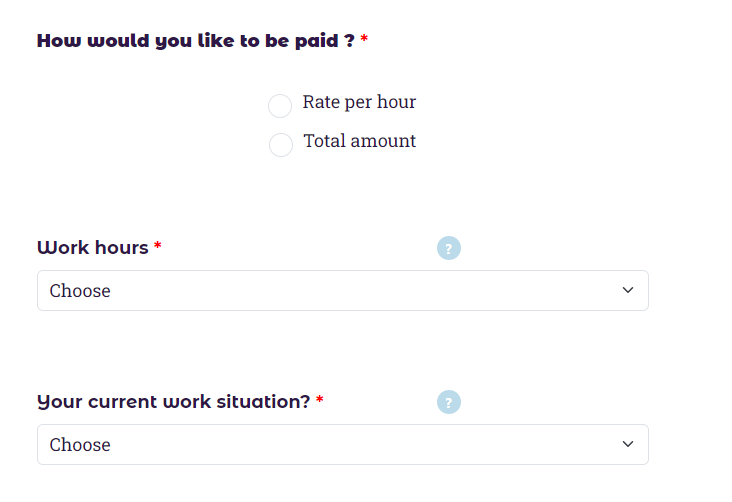
Category Profile - Work Preferences and Availability.
This section requires you to specify your working situation, including your payment expectations, available work hours, and current employment status. Here's what you'll need to provide:
- Payment Expectations: Indicate how much you expect to be paid per job. You can choose to specify an hourly rate or a total payment amount for the job.
- Available Work Hours: State the number of hours per week you are available to work.
- Employment Status: Describe your current work situation. Are you working part-time, full-time, or is this a side hustle?
The information you provide will be prominently displayed on your profile, offering Bookers a clear first impression of your availability and expectations.
SkillBooking portfolio
Your SkillBooking portfolio is a crucial tool for showcasing your completed projects to potential clients. Here's how it works:
Making Projects Public:
- SkillBooking Portfolio Visibility: When you make a project visible on your SkillBooking portfolio, it becomes accessible to Bookers (clients) searching for freelancers. If no projects are made public, your profile will not appear in searches, limiting your visibility on the platform
- Public Profile: In addition to your SkillBooking portfolio, you can create a public profile. This profile is accessible to viewers outside of the SkillBooking platform and is an excellent way to showcase your skills and projects to a broader audience. The public profile includes a shareable link that you can use to promote your work outside the platform. Note that creating a public profile requires a subscription or a student account.
Editing Projects:
- How to Edit: You can edit your projects at any time. On your homepage, click the 'View' button next to the project you want to update. Scroll to the bottom of the project details and click 'Edit' to modify any aspect of the project, including category information.
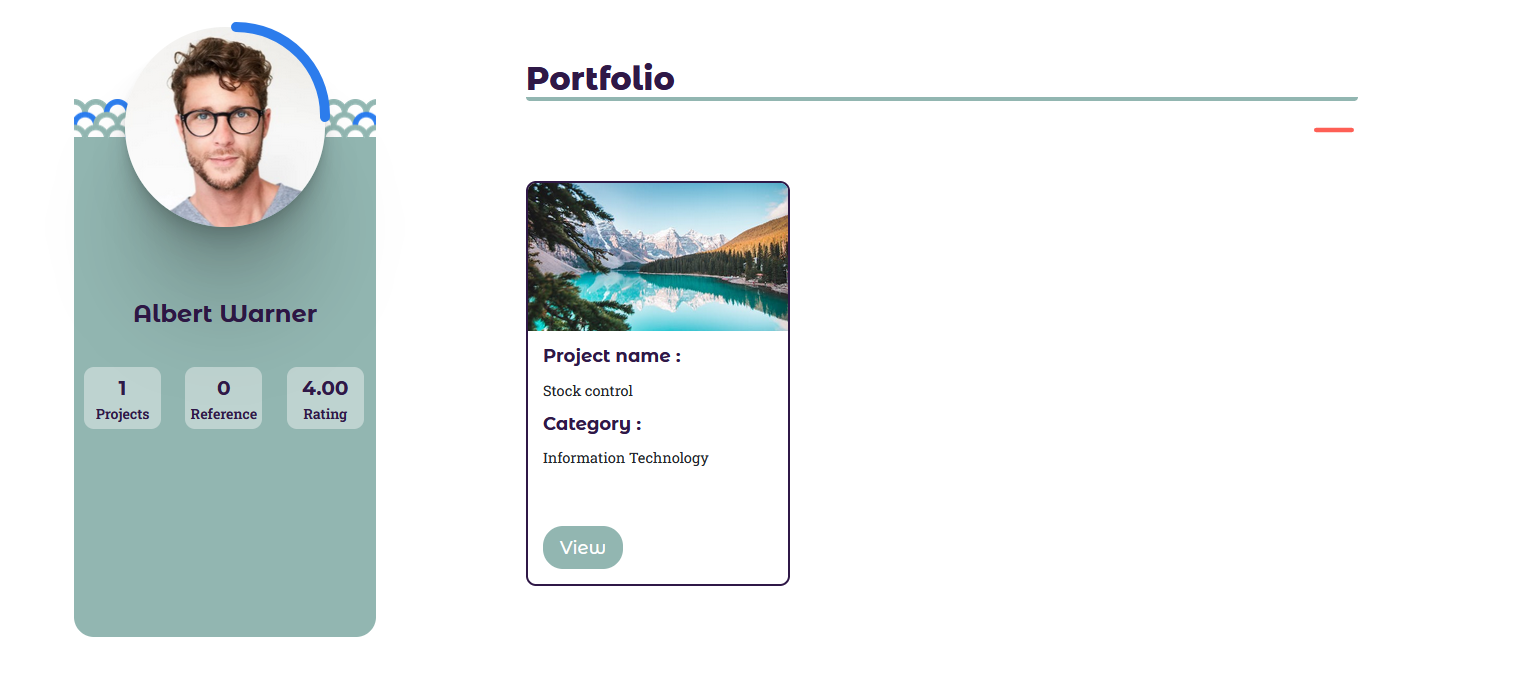
4. Public profile
To have a public profile on SkillBooking, a subscription or student account is required. Once you have selected a suitable plan, your public profile will become available. This profile can be shared using a unique public link, making it accessible to individuals outside of SkillBooking. Feel free to share your public profile on other digital platforms to showcase your skills and projects widely.
Adding Projects to Your Public Profile
Project Visibility:
- During Project Creation: When building your projects, the final step includes questions about project visibility. Here, you can choose to make the project visible on your SkillBooking profile, as well as on your public profile. This ensures that the projects are displayed both within the platform and to the broader audience via your public profile.
- Editing Existing Projects: You can also add projects to your public profile by editing them. From your home screen, click on the 'Edit' button next to the project you want to update. In the project settings, you will find options for 'Project Visibility' and 'Public Profile Visibility.' Enabling these options will include the project in your public profile.
Building Your Public Profile
Project Visibility:
- Additional Details: In your public profile, you can include additional information about yourself and your overall experiences. This is an excellent opportunity to provide potential employers with a fuller picture of who you are and what you bring to the table.
- Contact Information: You can also add your contact email address to your public profile, making it easier for interested parties to reach out to you directly.
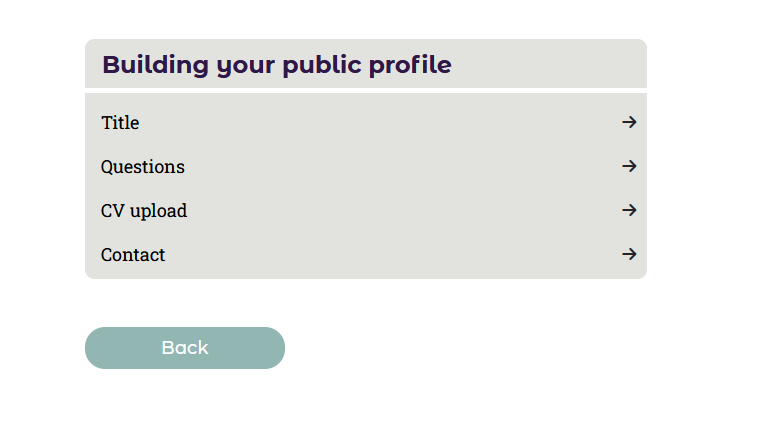
Give it a try! Copy your profile link and paste it into another window to see how your profile appears to others. This feature allows you to preview and refine your public profile to ensure it accurately represents your professional image.
5. References
What is a Reference?
A reference is a statement or feedback from someone who can attest to your skills, experience, and professionalism. This could be a former employer, mentor, colleague, or client who has worked with you in a professional capacity. Including references on your public profile enhances your credibility and helps potential clients or employers gain a better understanding of your qualifications.
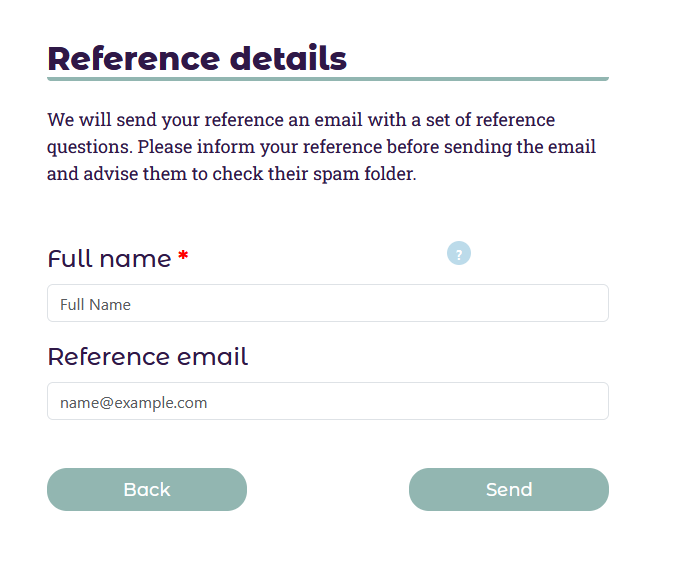
Sending a Reference Request:
- You can send a reference request through SkillBooking by navigating to your public profile. In the reference section, select "Contact a Reference."
- Provide the email address and full name of the individual you wish to include as a reference. SkillBooking will automatically send them an email containing a link to complete a reference check about you.
Completing the Reference Check:
- The reference will receive a questionnaire through the provided link, which they will fill out with information about their experience working with you. This may include feedback on your skills, work ethic, reliability, and other relevant aspects.
Making References Visible on Your Public Profile
Reviewing Feedback:
- After your reference has completed the questionnaire, you will be notified. You can then review the feedback provided. It’s important to read through the comments carefully to ensure they accurately represent your professional image.
Displaying on Public Profile:
- To make the feedback visible on your public profile, navigate to the public profile section under references.
- Select "Reference" and then choose the reference you wish to display. Click on your reference's name, then select "View" and opt to "Add the Reference to Your Account."
- Only the references you approve will be visible on your public profile, allowing you to control the information showcased to potential clients.
Including references on your public profile can significantly enhance your credibility and provide potential clients with confidence in your abilities. Make sure to choose references who can provide strong, positive feedback about your work.
6. Job notifications
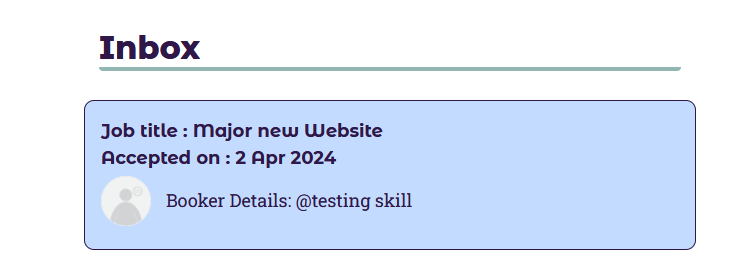
When a booker selects your profile for a job, you will receive a notification via email, and the job offer will be displayed in the notifications tab. You can review the job details and, if available, access feedback from other skillers regarding the booker. This information can provide valuable insights to help you make an informed decision about whether to accept the job opportunity.
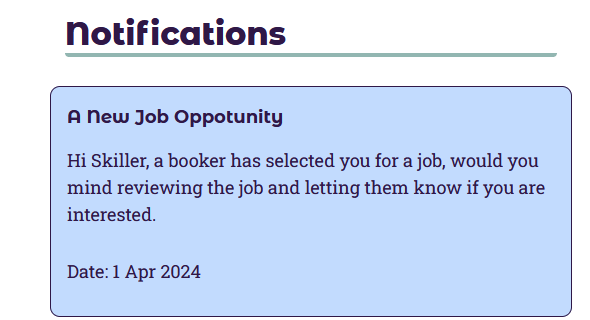
Upon receiving a job offer, you have the option to either accept or decline it. In the case of declining, you will be prompted to provide a reason for your decision. If you accept the job, it will appear on your home page for further management and action.
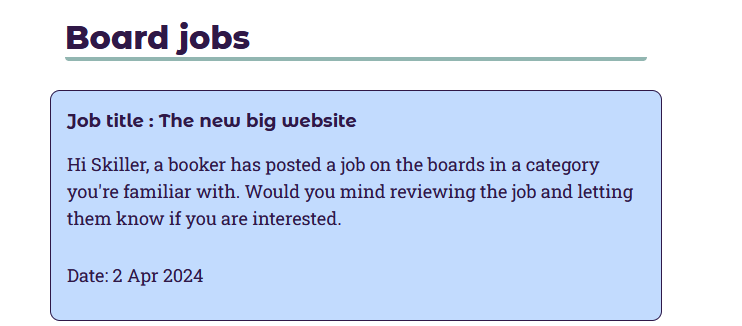
7. Board notifications
Bookers have the ability to add a job to the boards, which will be visible to all skillers within the relevant category and subcategory. The bookers can choose to make the job visible either to the entire country or a specific state/region. As a skiller, you will receive an email notification and a board notification on the SkillBooking website when a new job is posted.
You can review the job details and express your interest to the booker or decline the job if it doesn't align with your skills or availability. The booker will then review the profiles of all interested parties and select a skiller to work with. If you are chosen for the job, you will receive a notification and the job will appear on your home page for further action and management.
8. Message system
Once a job has been accepted, the messaging system will become active. You can engage in live conversations with the other person involved in the job. If the other person is currently offline, they will receive the messages once they return and can respond accordingly. This allows for seamless communication and collaboration throughout the duration of the job.
When a job is completed, mutually agreed upon, or left incomplete, the messaging system will deactivate. This means that you will no longer be able to send or receive messages related to that particular job. However, you can still access the conversation history for future reference if needed.
9. Completed job
Once both parties agree that the job has been completed, you can follow these steps:
- On your home page, locate the job and click on the "Job View" button.
- Scroll down until you find the "Completed Job" button.
- Click on the "Completed Job" button to access the requested feedback form.
- Fill out the feedback form for the booker based on your experience.
- After submitting your feedback, wait for the booker to provide their feedback.
By completing the requested feedback form and waiting for the booker's feedback, you can ensure a thorough evaluation of the job and maintain a reliable feedback system.
If you receive feedback with a rating of less than three stars, you have the opportunity to respond to it. Follow these steps to provide your response:
- Go to your home page and locate the job for which you received the low rating.
- Find the review you received and click on the "Comment" button. Please note that this button is only available if the star rating is less than three.
- Share your perspective on what happened and express how you believe you could have improved the situation.
- Remember that this comment will be visible on your public profile, so strive to maintain professionalism and provide a constructive response.
By utilising this feature, you can address concerns and demonstrate your willingness to learn from feedback, enhancing your public profile's credibility.
10. Mutual agreement
In cases where a job cannot be completed by either party, both the skiller and the booker have the option to reach a mutual agreement. By selecting this option, the job will be removed from the skiller's profile. The booker can then decide whether to delete the job entirely or search for a new skiller to fulfill the requirements. It's important to note that in such instances, no feedback will be given to either party as the job was not successfully completed.
If a skiller has completed a portion of the work and believes that feedback is necessary, they have the option to click on the "Disagree" button. This indicates their disagreement with the mutual agreement and prompts the opportunity for feedback. By clicking on the "Disagree" button, the skiller can express their perspective and provide feedback regarding the completed work.
If the "Disagree" button is selected, the party choosing this option will be required to provide photo evidence and explain why they believe they should receive feedback. Notifications will be sent to the other party involved; however, the messaging system will be disabled during this process.
The party who initially selected the mutual agreement will then have the opportunity to either remove the mutual agreement or submit their own evidence in response.
In such cases, the final decision will be made by the admin after a thorough investigation of the provided evidence. The admin will assess the situation and make a decision based on the available information.
11. Incomplete job
In situations where a job cannot be completed because one party has disappeared or is not responding, an "Incomplete Job" can be raised. This notifies both parties involved, but the messaging system will be disabled during this process.
Raising an "Incomplete Job" serves as a notification and acknowledgment that the job was left unfinished due to the unavailability or lack of response from one party. It allows for proper documentation and ensures transparency between the parties involved.
If a party selects the "Incomplete Job" option, they will be required to submit photo evidence along with an explanation of what happened. The receiving party will be given a specific timeframe to respond. If the receiving party responds, they will also be required to submit their evidence regarding the situation.
Once both parties have provided their evidence, the admin will carefully review the submissions and make the final decision based on the evidence presented. The admin will consider all relevant information and circumstances to ensure a fair and impartial resolution.
However, if the receiving party does not respond to the "Incomplete Job" notification within the given timeframe, the admin will make a decision based solely on the evidence provided by the initiating party.
The involvement of the admin ensures a thorough evaluation of the situation and promotes fairness in resolving disputes arising from incomplete jobs.
For the skiller, if the admin accepts their evidence regarding an incomplete job, feedback will be requested from the booker. However, if the booker still does not respond with feedback, the admin can give generic feedback to the skiller.
On the other hand, for the booker, if the admin accepts their evidence, the skiller involved in the incomplete job will be removed from the job. This allows the booker to search for a new skiller to complete the job.
These processes ensure that appropriate measures are taken to address incomplete jobs and provide a fair resolution for both skillers and bookers involved.
12. Understanding the Token System
At SkillBooking, tokens play a crucial role in facilitating transactions and ensuring commitments are honoured. Here’s what you need to know about the token system:
- Token Value: Each token is valued at $25. This standardised value simplifies transactions, making it clear and predictable for both Bookers and Skillers.
- Using Tokens: Tokens are primarily used by Bookers to secure your services. As a Skiller, you do not need to purchase tokens, but you will be involved in transactions where tokens are used as a form of deposit by the Booker.
- Payout of Tokens: If you wish to view or manage your tokens, such as checking the status of a token refund, you can do so by navigating to “Settings” and selecting “Available Tokens.” This section of your profile allows you to track and manage your tokens efficiently.
- Worst Case Scenario: In exceptional cases, such as if a job is not completed due to the Booker's failure to cooperate or if the Booker withdraws from the engagement without fulfilling their obligations, the admin may decide to allocate the token to you as compensation. This measure ensures fairness and acknowledges your time and effort.
This token system is designed to maintain a secure and equitable platform, enhancing trust and reliability among all users.
13. Sleep mode
The skiller has the option to activate sleep mode, which temporarily deactivates their account. It's important to note that this deactivation does not render the account unusable. The skiller can still create projects and use their public profile. However, during sleep mode, the skiller's profile will not be visible to bookers when they are selecting someone for a job.
14. Photo upload
If your photo does not meet the admin's approval, you will receive an email notification informing you of the issue. To address this, you can upload a new photo by following these steps:
- Access your account's "Settings" tab.
- Look for the section titled "Photo Upload" in the menu.
- Click on that section to proceed with uploading a new photo.
- Ensure that the new photo adheres to the required guidelines specified by the admin.
- Save the changes once you have uploaded the new photo.
By following these steps, you can update your photo and meet the necessary requirements set by the admin.
15. Photo ID upload
If your photo ID does not meet the admin's approval, you will receive an email notification informing you of the issue. To address this, you can upload a new photo ID by following these steps:
- Access your account's "Settings" tab.
- Look for the section titled "ID Upload" in the menu.
- Click on that section to proceed with uploading a new ID.
- Ensure that the new ID adheres to the required guidelines specified by the admin.
- Save the changes once you have uploaded the new ID.
By following these steps, you can update your ID and meet the necessary requirements set by the admin.
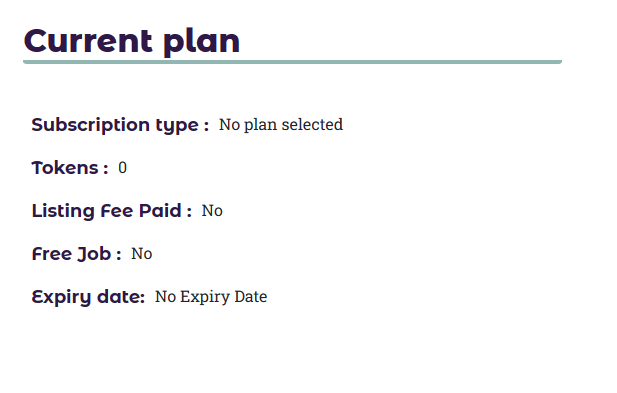
16. Payment
To access the additional features offered by the payment profile, please follow these steps:
- Access your account's "Settings" tab.
- Look for the section titled "Payment" in the menu.
- Click on the section titled "Select a Plan" to access the available subscription options.
- Select the subscription plan that best suits your needs.
- Follow the instructions provided to complete the payment process.
- Once your subscription is successfully activated, you will unlock features such as a public profile and more.
If you currently have a payment plan, it can be managed by following these steps:
- Access your account's "Settings" tab.
- Look for the section titled "Payment" in the menu.
- Click on the section titled "Manage Subscriptions".
- Here you will be able to manage your plans, change your plan, or even cancel your subscription.
- Please note, if you cancel your plan, it will remain active until the expiry date, and then our system will change your account to a free plan.
- Please wait at least 48 hours before your expiry date if you want to change plans. The system will automatically update your subscription type immediately, without issuing a refund.
By subscribing to the payment profile, you can enjoy enhanced functionality and take advantage of additional features on the platform.
17. Templates
SkillBooking offers invoice and contract templates to assist you when initiating a job. These templates serve as useful tools for establishing clear guidelines between the skiller and the booker. In the event of any issues or disputes, these templates can also be submitted as evidence.
To access the templates, simply navigate to the settings section of your account and locate the "Templates" tab. From there, you can download the invoice and contract templates to customize and utilize for your specific job requirements.
By utilising these provided templates, you can enhance communication, establish expectations, and have documentation in place to protect both parties involved in the job.
Booker Menu
Click on the section you would like to go to:
- Account activation
- Basic
- Create a job
- Finding a skiller
- Adding the job to boards
- Message system
- Completed job
- Mutal agreement
- Incomplete job
- Token
- Photo upload
- Photo ID upload
- Templates
1. Account activation
Your account is pending activation by the admin. To complete the activation process, the admin will review the photo ID and the photo you uploaded during registration. If both documents pass the verification process, your account will be successfully verified and activated.
2. Basics
Watch this quick guide on the basics and learn how to navigate the platform!
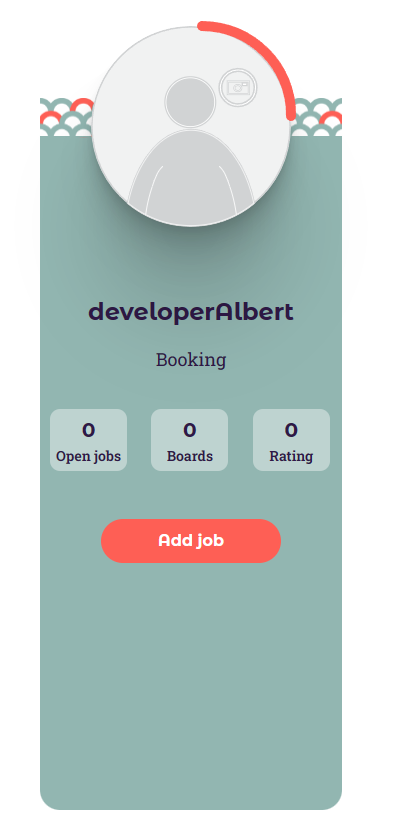
3. Create Job
To create a job, simply click on the prominent "Add Job" button. Fill out the required fields in the request form, providing all necessary details for the job. Once you have completed the form, the job will appear on your home page for further management and action.
All jobs can be edited. On your homepage, click on the 'View' button of the job you would like to change. At the very bottom of the job information, there is an 'Edit' button. You can select the category you would like to edit. Please note that once you have selected a skiller, you will not be able to edit the job.
4. Finding a skiller
To access the skillers and their services, you will need a subscription. You can add a subscription to your account by following these steps:
- Go to the settings section of your account.
- Look for the "Payment" tab in the menu.
- Click on the tab to access the subscription options.
- Select the desired subscription plan that suits your needs.
- Follow the instructions to complete the payment process.
Once you have successfully subscribed, you will be able to browse and connect with skillers on the platform.
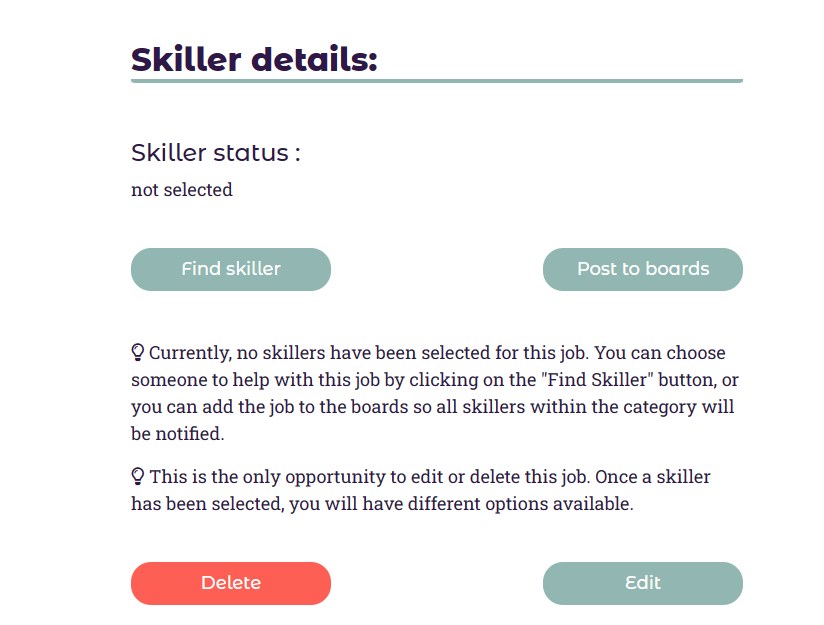
To access the "Find Skiller" button for a bookParticular job, follow these steps:
- On the home page, locate the job you are interested in.
- Click on the "View" button associated with that job to open the job details.
- Scroll down the page until you reach the "Skiller Selected for the Job" section.
- Within that section, you will find the "Find Skiller" button.
- Click on the "Find Skiller" button to explore other available skillers for the job.
By using the "Find Skiller" button, you can broaden your search and explore other skillers who may be suitable for the job.
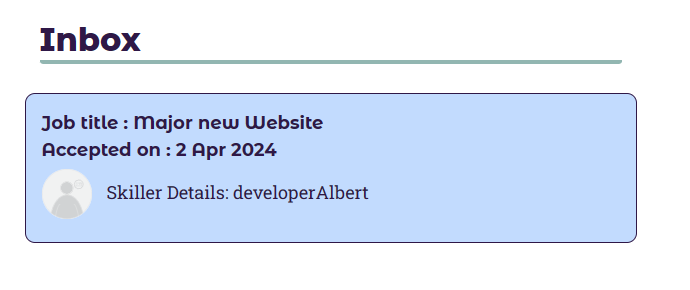
Once a skiller has been selected for a job, the skiller will receive notifications via the SkillBooking website and email. They will be notified about their selection and given the option to accept the job.
Upon accepting the job, you, as the booker, will receive a notification confirming the skiller's acceptance. This notification serves as a confirmation that the skiller has agreed to proceed with the job.
5. Adding the job to boards
To add a job to the boards, a subscription is required. You can add a subscription to your account by following these steps:
- Go to the settings section of your account.
- Click on the "Payment" tab in the menu
- Within the payment tab, you can select and add a subscription plan that suits your needs.
- Follow the instructions provided to complete the payment process.
Once you have successfully subscribed, you will be able to add jobs to the boards.
To add a job to the boards, please follow these steps:
- On the home page, locate the job you want to add to the boards.
- Click on the "View" button associated with that job to access the job details.
- Scroll down to the section titled "Skiller Selected for the Job".
- Within that section, you will find the "Add to Boards" button.
- Click on the "Add to Boards" button to include the job in the boards.
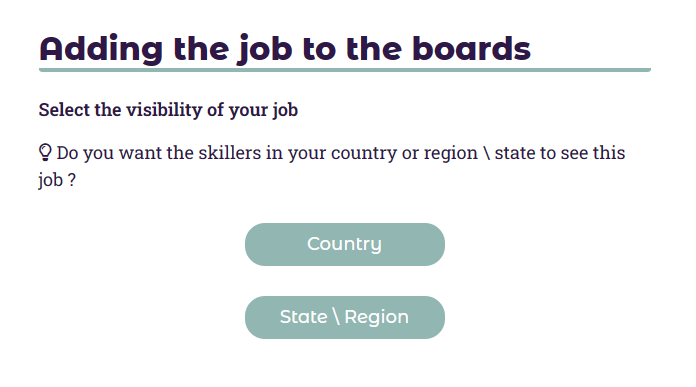
By using the "Add to Boards" button, you can make the job visible to skillers within the respective country or state/region. This increases the chances of finding suitable skillers for the job and allows them to express their interest in working on the project.
When adding a job to the boards, you will have the option to choose whether to display the job to your country or a specific state/region. Regardless of your choice, all skillers within the category and subcategory of your job will be notified about the job. This ensures that the job reaches a wide pool of potential skillers who match the required skills and expertise for the job.
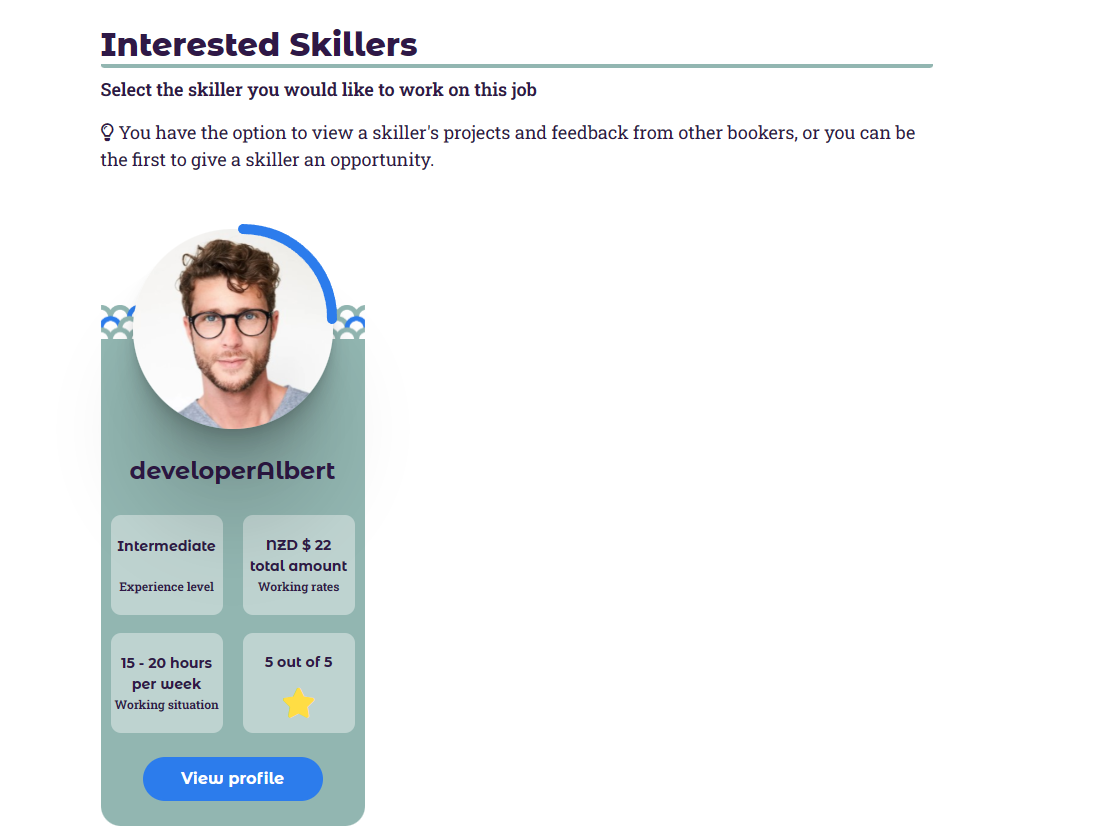
Once the job has been added to the boards, you will receive notifications about skillers who have shown interest in the job. To view the profiles of interested skillers, you have two options:
- Option 1:
- Go to the "Boards" tab in your account.
- Find and click on the job that you have added to the boards.
- This will display the profiles of skillers who have expressed interest in the job.
- Option 2:
- On your home page, locate the job and click on the "Job View" button.
- Look for the "Interested Skillers" button, which will appear on the job details page.
- Click on the "Interested Skillers" button to view the profiles of skillers who have shown interest in the job.
By exploring the profiles of interested skillers, you can gather more information about their skills, experience, and suitability for the job.
6. Message system
Once a job has been accepted, the messaging system will become active. You can engage in live conversations with the other person involved in the job. If the other person is currently offline, they will receive the messages once they return and can respond accordingly. This allows for seamless communication and collaboration throughout the duration of the job.
When a job is completed, mutually agreed upon, or left incomplete, the messaging system will deactivate. This means that you will no longer be able to send or receive messages related to that bookParticular job. However, you can still access the conversation history for future reference if needed.
7. Completed Job
Once both bookParties agree that the job has been completed, you can follow these steps:
- On your home page, locate the job and click on the "Job View" button.
- Scroll down until you find the "Completed Job" button.
- Click on the "Completed Job" button to access the requested feedback form.
- Fill out the feedback form for the skiller based on your experience.
- After submitting your feedback, wait for the skiller to provide their feedback.
By completing the requested feedback form and waiting for the skiller's feedback, you can ensure a thorough evaluation of the job and maintain a reliable feedback system.
If you receive feedback with a rating of less than three stars, you have the opportunity to respond to it. Follow these steps to provide your response:
- Go to your home page and locate the job for which you received the low rating.
- Find the review you received and click on the "Comment" button. Please note that this button is only available if the star rating is less than three.
- Share your perspective on what happened and express how you believe you could have improved the situation.
- Remember that this comment will be visible on your public profile, so strive to maintain professionalism and provide a constructive response.
8. Mutual Agreement
In cases where a job cannot be completed by either bookParty, both the skiller and the booker have the option to reach a mutual agreement. By selecting this option, the job will be removed from the skiller's profile. The booker can then decide whether to delete the job entirely or search for a new skiller to fulfill the requirements. It's important to note that in such instances, no feedback will be given to either bookParty as the job was not successfully completed.
If a skiller has completed a portion of the work and believes that feedback is necessary, they have the option to click on the "Disagree" button. This indicates their disagreement with the mutual agreement and prompts the opportunity for feedback. By clicking on the "Disagree" button, the skiller can express their perspective and provide feedback regarding the completed work.
If the "Disagree" button is selected, the bookParty choosing this option will be required to provide photo evidence and explain why they believe they should receive feedback. Notifications will be sent to the other bookParty involved; however, the messaging system will be disabled during this process.
The bookParty who initially selected the mutual agreement will then have the opportunity to either remove the mutual agreement or submit their own evidence in response.
In such cases, the final decision will be made by the admin after a thorough investigation of the provided evidence. The admin will assess the situation and make a decision based on the available information.
9. Incomplete Job
In situations where a job cannot be completed because one bookParty has disappeared or is not responding, an "Incomplete Job" can be raised. This notifies both bookParties involved, but the messaging system will be disabled during this process.
Raising an "Incomplete Job" serves as a notification and acknowledgment that the job was left unfinished due to the unavailability or lack of response from one bookParty. It allows for proper documentation and ensures transparency between the bookParties involved.
If a bookParty selects the "Incomplete Job" option, they will be required to submit photo evidence along with an explanation of what happened. The receiving bookParty will be given a specific timeframe to respond. If the receiving bookParty responds, they will also be required to submit their evidence regarding the situation.
Once both bookParties have provided their evidence, the admin will carefully review the submissions and make the final decision based on the evidence presented. The admin will consider all relevant information and circumstances to ensure a fair and imbookPartial resolution.
However, if the receiving bookParty does not respond to the "Incomplete Job" notification within the given timeframe, the admin will make a decision based solely on the evidence provided by the initiating bookParty.
The involvement of the admin ensures a thorough evaluation of the situation and promotes fairness in resolving disputes arising from incomplete jobs.
For the skiller, if the admin accepts their evidence regarding an incomplete job, feedback will be requested from the booker. However, if the booker still does not respond with feedback, the admin can give generic feedback to the skiller.
Decisions regarding the assignment of a token to a Skiller are made under exceptional circumstances. If a dispute arises and the Booker fails to engage in the resolution process or disappears, the admin may assign the token to the Skiller as compensation for their effort and time. This action is taken only in the worst-case scenarios to ensure fairness and to protect the interests of our active community members.
On the other hand, for the booker, if the admin accepts their evidence, the skiller involved in the incomplete job will be removed from the job. This allows the booker to search for a new skiller to complete the job.
These processes ensure that appropriate measures are taken to address incomplete jobs and provide a fair resolution for both skillers and bookers involved.
10. Token
At SkillBooking, we use a token-based system to simplify and secure transactions between Bookers and Skillers. Here's how it works:
- Purchasing Tokens: Each token you purchase is valued at $25. Tokens can be used to secure bookings with Skillers.
- Using Tokens: When you create a job, one token is required as a refundable deposit to confirm your commitment. This deposit ensures that both bookParties are protected and committed to the transaction.
- Refund of Tokens: If the job is completed satisfactorily, your token is refunded to your account. Should you decide to cancel the job or if it's not fulfilled by the Skiller, the token can still be refunded depending on the circumstances outlined in our cancellation policy.
11. Photo upload
If your photo does not meet the admin's approval, you will receive an email notification informing you of the issue. To address this, you can upload a new photo by following these steps:
- Access your account's "Settings" tab.
- Look for the section titled "Photo Upload" in the menu.
- Click on that section to proceed with uploading a new photo.
- Ensure that the new photo adheres to the required guidelines specified by the admin.
- Save the changes once you have uploaded the new photo.
By following these steps, you can update your photo and meet the necessary requirements set by the admin.
12. Photo ID upload
If your photo ID does not meet the admin's approval, you will receive an email notification informing you of the issue. To address this, you can upload a new photo ID by following these steps:
- Access your account's "Settings" tab.
- Look for the section titled "ID Upload" in the menu.
- Click on that section to proceed with uploading a new ID.
- Ensure that the new ID adheres to the required guidelines specified by the admin.
- Save the changes once you have uploaded the new ID.
By following these steps, you can update your ID and meet the necessary requirements set by the admin.
13. Templates
SkillBooking offers invoice and contract templates to assist you when initiating a job. These templates serve as useful tools for establishing clear guidelines between the skiller and the booker. In the event of any issues or disputes, these templates can also be submitted as evidence.
To access the templates, simply navigate to the settings section of your account and locate the "Templates" tab. From there, you can download the invoice and contract templates to customize and utilize for your specific job requirements.
By utilising these provided templates, you can enhance communication, establish expectations, and have documentation in place to protect both bookParties involved in the job.

